
《Resident Evil 9: Requiem》 Warehouse Generator, Willis Tower & Relay Location
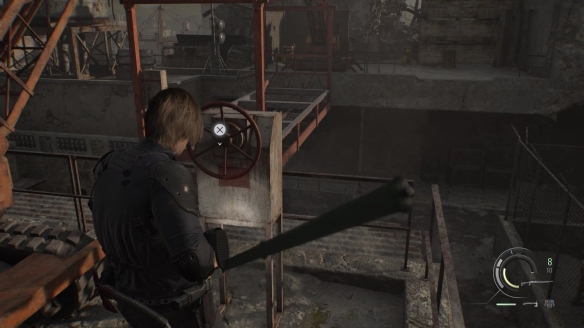
With your full gasoline can, you can refuel the generators you've encountered, most importantly the one on the roof of the logistics warehouse near the BSAA Central Camp.
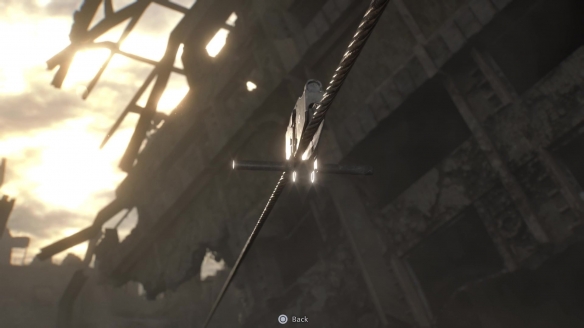
From the camp, take the elevator you previously came down from the distributor's floor to return to the generator. Refuel it to open the door leading to Willis Tower. You'll then need to use a zip line to reach the tower.
Willis Tower was heavily damaged by missile strikes in Raccoon City, reduced almost to ruins.
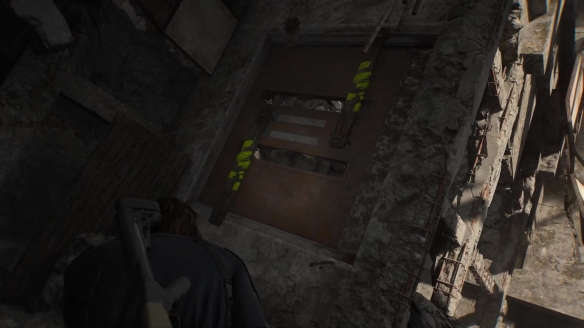
Climb the stairs past the broken elevator and over the rubble. You'll see double doors secured by two boards wrapped in yellow tape. Shoot the boards to climb through the hole in the wall.
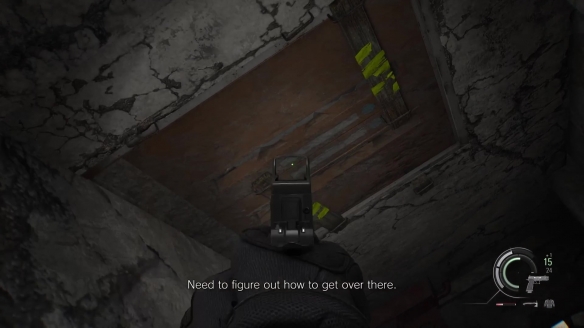
For the next section, keep an eye out for planks you need to shoot and prepare for some precarious jumps. The entire building is tilted, so be sure to check both above and below to find the boards that need to be destroyed to proceed. You'll eventually find an elevator door you can pull open. Inside the shaft are two fallen elevators; take care to avoid them as you climb.

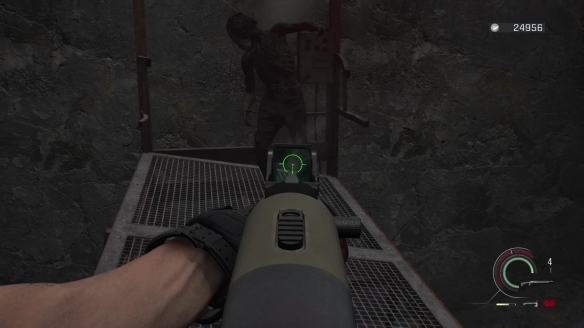
In the next area, you can break the glass to drop zombies, but be careful not to fall yourself. When you reach the glass, first shoot the first door boarded up with planks. Then, shoot the two zombies ahead through the glass. Next, move right and break the glass under the rubble to create a climbing path — watch out for the zombie with a grenade. Be prepared for an attack as you climb up.
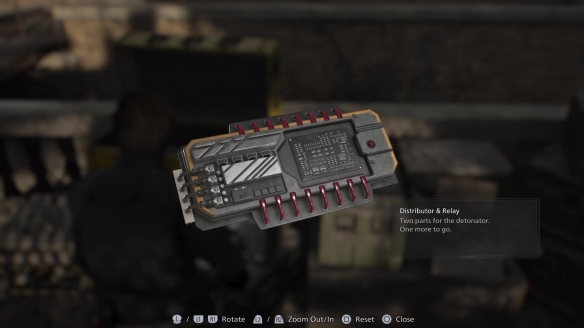
After overcoming these challenges, you'll find the relay needed for the detonator in a yellow crate at the end of the tower. Combine the relay with the distributor you obtained earlier to get the "Distributor & Relay".
Now you just need to get back to the main street, but it's easier said than done. What follows is a linear combat section with significant difficulty. You'll need to activate two cranes to take the construction elevator down, but Leon's path will be swarmed with zombies. Keep an eye out for shootable ladders and crane hooks to create paths forward, and collect any optional supplies you find — they'll be useful later.
Once you activate the elevator and begin descending, you'll face waves of enemies spawning continuously. You'll need to hold them off. Hopefully you've saved plenty of shotgun shells, as they will be essential here. At the end of this section, you'll clear one more wave of zombies in the dark before finally returning to the main street.